 Soooooo I thought I'd start making this Pack n' Play business a little more cozy for the hopefully long haul ahead of us.
 First thing's first, we need to get this baby bird some upgrades to the starchy Graco sheets to some softer ones while spending less than his college savings. Best place to look... my own linen closet!
Between the hubby and me we have tons of queen size sheets from our single days that just hibernate in our closet until the lucky day when guests come to visit. And even then, only the few and the fortunate get slept on. So I "borrowed" a few jersey sets to recycle into pack n' play sheets.
And it took me whole 20 minutes!
Which is about all the sewing time I have these days :)
Wanna try?
Here's what you need:
- 1 yard of fabric
- 36 inches of 1/4 or 3/8 inch elastic
- Thread
- Sewing goodies (machine, scissors etc)
- 20 minutes
Here's all you do:
Step 1: Cut the fabric
A standard Graco Pack N' Play sheet is 26" wide x 38 1/2" long when it's all said and done, so if you don't have a Graco brand make sure to measure your standard sheets or actual pack n' play to be sure these measurements will work. A few options:
- For raw or serged edges cut the fabric 34″ wide x 43″ long
- For hemmed ends cut the fabric 35″ wide x 43″ long
- If using knit or jersey fabric like I did in this tutorial cut 1" smaller in each direction to account for the stretch.
Step 2: Cut the corners
Fold the fabric in half long ways and make sure the corners match up as closely as possible.
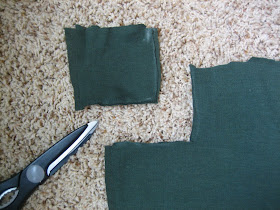
Mark 4″x 4″ squares out of each of the 4 corners and cut them out.

Step 3: Sew the corners together
Fold the corners of the corners together to make a diagonal edge with the fabric inside out. Serge or stitch together with a zig zag stitch on your machine
Step 4: Finish the edges
I simply serged my edges since no one will see them, but since I know not everyone has a serger I made one sheet with hemmed edges to show you :)
Step 5: Attach the elastic
Cut 4 pieces of elastic each 9" long. Fold the 9" piece in half & mark the centerTurn the fabric inside out and line up the center of the elastic with the edge of the seam in the corner and pin in place.
Then you want to mark out 9″ from both sides of that point and pin the lose ends of the elastic to the sheet. Start sewing at the middle of the elastic on the seam.
 Stretch the elastic from both ends as you go and sew the elastic to the sheet with a zig zag stitch then turn over and sew in the other direction.
 It should look something like that when you're done.
 Or, if you used the hemmed edges string the elastic through to the 9" mark and sew in place. Pull the other end to the 9" mark on the other side of the corner and sew in place.
Go ahead, that's all... try it on...
Now, you'll have to excuse me while I go snuggle with my favorite new born and that scrumptiously soft baby skin!


I have made several pack and play sheets and made mine a little different without the elastic and they stay on well-Wish I had one here so I could take a picture- I like your design too You baby is very pretty. My daughter is still using her pack and play for her girls and they are 2 1/2- she is very lucky to be able to do that - just for trips etc.
ReplyDeleteThanks for the how to
Posts pretty good, it's very useful for parents who do possess small pack n play. Thanks for article
ReplyDeleteFound interesting site about pack and play. Check it :)
ReplyDeleteHi! Could a casing be used instead of sewing the elastic to the fabric? how much extra fabric would I need for that? Thanks!
ReplyDeleteGreatt reading this
ReplyDelete