In only 30 minutes of TV!!
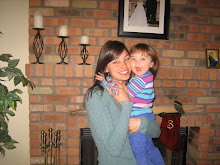
That's it! I can't hide my true feelings any longer... I LOVE MATCHING OUTFITS. I realize it's too ridiculous for my husband and I to match like teenagers in love any more. But what I have discovered is that it's totally acceptable and even cute to do with my kids! The best thing is that it's Spring and there is nothing easier to pull off matching than Mommy and me skirts and dresses.
Wanna try?
Supplies:

1) A 20-30 min episode of Super Why (or other favorite cartoon) for 'the little Mommy' :)
2) Wide band elastic (3" for Mommy and 3/4 to 1" for 'the little Mommy')
3) About 2-3 yards of matching fabric depending on the length of Mommy's skirt
4) Pins, pins and more pins. I know, I'm a recovering non-pinner myself, but it does help for this one.
5) A tape measure
Step 1.
Measure around your waist or where you want to wear the skirt and cut the wide elastic about 1" smaller.
Remember to stretch out your elastic as much as you can first, so it doesn't do so after you've worn your "at-one-time-the-perfect-fit" skirt a few times.
Step 2.With a zig zag stitch, sew the ends of the elastic band together using a 1/4 inch seam.

Step 3.Measure the desired length of your skirt starting from the bottom of the wide waist band. I wanted my skirt to hit above my knees about 18" total (I know, you're probably thinking that's just above your knees?!!).

My waist band was 3" wide, so I did these calculations:
18" (total length) -3" (elastic band width) - 1/4" (seam allowance on waist band) + 3/4" (seam allowance for 1/2" at the bottom and 1/4" to sew onto the elastic) = 15 1/2" long fabric
The width of your fabric will be 1.5 times the length of your elastic.
So my total cut was 15 1/2" x 52 1/2" (or 1.5(35")
Step 4.Sew your fabric together in one huge tube! A
French seam will help you cut down on your seam allowance and has a nice professional finish to it.
Step 5:Here's where you get to use your pins!
Pin your fabric tube to your elastic tube in sections starting with 4 and working your way down.


All the way down...

Are we there yet?
Step 6. We're almost done! If your cartoon is almost over you can insert snack into child's mouth as a last resort :) "The little mommy" skirt is much quicker!


Use a zig zag stitch and a 90/14 or 100/16 size needle to sew your fabric onto your elastic. Carefully stretch the elastic as you sew. I gently hold the back and pull tighter on the front as the machine feeds the fabric in. It's hard to describe, but it feels pretty natural once you get going. Regardless, go slow and take your time here. Also, don't forget to remove the pins a few inches ahead.
And it's just that easy!
The "Little Mommy Skirt" is done very similarly with a few small adjustments that actually make it easier.
1) Instead of sectioning the fabric off to sew onto the elastic, I simply ruffled it first and then sewed it on. I didn't do this with the Mommy skirt, because I think the section gives it a more even ruffle. With the "little skirt" it's less noticeable, so why not ditch those silly pins?
2) I added an extra layer of ruffle to the bottom of the skirt by ruffling a piece of fabric 2 times the length of the waist and pulling the ruffles until it was the same size as the bottom of the skirt.
3) I cheated. Just a little. Instead of sewing the "little me" skirt onto elastic, I had some abandoned white cotton shorts from last summer's $1 section at Target that I sewed the fabric right onto!!! Shhhhhhhhhhhh!!! I'm so bad, I know. But it's practically the same thing, right? You still have to stretch the elastic as you sew :)

Now go scoop up your patient little lady and give her lots of hugs and kisses for letting you sew adorably matching outfits!


Maybe she'll like it so much, she won't mind hanging around a little while longer while you make her a shirt to go with it.


 My personal favorite touch :)
 My personal favorite touch :)

 As you can see, I'm not a very creative hider though :)