Showing posts with label Girls Clothing. Show all posts

Monday, April 11, 2011

Peep a boo undies

Whether we actually eat them or not, you can't deny that nothing gets us in the mood for Easter treats like seeing yummy little Peeps


But I'd say more importantly nothings says yummy like seeing one on this cute little bottom!


I'm so glad I finally got around to making these sneaky little undies!

I just love everything about them:
The springy yellow colors, the subtle surprise you may or may never see, and of course, I can't get enough of the down right punniness of the whole thing!!


So here's a little sneak peep
(oh, I'm dying over here!)

at this quick and easy tutorial to spice up your Easter outfit.

Wanna try?

Here's what you need:
  • Plain panties
  • Felt
  • Embroidery thread and needle
  • One cute little tush to pull this all off

Here's all you do:

Step 1: Trace and cut out a peep onto your felt

Dana from Made has a nice little template I borrowed for her peep garland here that you can use.

Step 2: Stitch two dotty eyes and a little peep nose

You can also use a fabric pen or paint to draw on the face, but I'm on a limited craft access with not all of our boxes unpacked just yet, so I stitched them with some embroidery thread I had in my sewing box.


Step 3: Pin the peepster onto the back of you panties


Step 4: Stitch it on!


Since the felt won't fray, I thought it was cute to give it a visible straight stitch along the edge, but you can applique it with a zig zag or even hand stitch with the embroidery thread.


And there you have it!!


Some perfectly Easter undies to keep hidden under your dress for the great hunt


But be careful....

you'll never know when they might pop out to say


Friday, February 11, 2011

1 shirt, 2 shirts, old shirts, new shirts! A little how to...

We're getting ready for our big move and we've been fighting the inevitable questions like

Oh really and how long has it been since you fit in
that?

College days are over... give up the holy t-shirt...

Come on, it's stained everywhere... call a rag when you see one!


Logically, given that we're in the middle of packing and moving a shirt with stains and a tiny little hole in the center like this should make the trash pile done and done...

But... I like sewing quite a bit more than I like packing and cleaning... sooooo naturally I was thinking more along the lines of the endless refashioning potential!

Then I came across this unworn brightly color, but slightly plan t-shirt and thought hum, it's still mighty cold up in the northwest this time of year (where we are moving). Perhaps a long sleeve t-shirt would get more use.

And that's how these two babies mingle, mashed and blended into 2 beautiful "new" shirts!

Shirt #1

Shirt #2

Ta-dah!!!


Adding sleeves to an regular tee is quick, easy and very functional especially when you're moving from Phoenix to Portland!


Wanna try???

Here's all I did:

First, I measured the length and circumference of the chunkiest part of Sienna's arm from the arm pit down to get the size of my sleeve strips. Measuring from the arm pit down is key here, because you'll be attaching the sleeve to the end of a short sleeve, not the shoulder.


Next, I cut the strips out of the bottom, using the natural hem of the t-shirt as the cuff of the sleeve. Then folded them in half and sewed a tube.


To attach the sleeves, I tucked my right-side-out tub through the armhole of the short sleeve shirt turned inside out.


Then pin all around making sure to line up the seams of the sleeves.


Carefully stretching from both sides as I sewed, I attached the long sleeve to the end of the short sleeve.


After those short 15 minutes or so I fold it right side out...


And there was my new long sleeve shirt!


Ha! What a walk in the park!

Like this one :)


Now, I was left with a half of a shirt and just as I was about to toss it...

Into my scraps bin (oh no, goodness sakes, not in the trash!), but yes, just before it hit that scraps bin I had an idea to refashion that part too into another dress/shirt!


So I pulled out some other left over strips of pink and purple jersey fabric I just knew I should save and pieced them together to make a cute little tiered top!

I still had the original problem of the stains and small hole in the shirt, so I used some other smaller scraps to make the waded flowers for the front and cut the shirt half slightly higher to take out the hole.


Almost PERFECT!!!

Almost is key here since I did have to fudge a little with the uneven sized scraps I was limiting myself to and the obvious fact that I really had to sneak in a few minutes here and there for this project while I was supposed to be packing not sewing :)


Shhhh... I still don't think the Mr. Seamstress knows I wasn't packing that whole time after all...

Should the case be taken to a jury think we'll just have to bring up the important facts here that I did save us money (which all husbands like), still finished my packing (which my husband mostly cares about) and even enjoyed myself just a little (favorite part of all)!!

Sunday, February 6, 2011

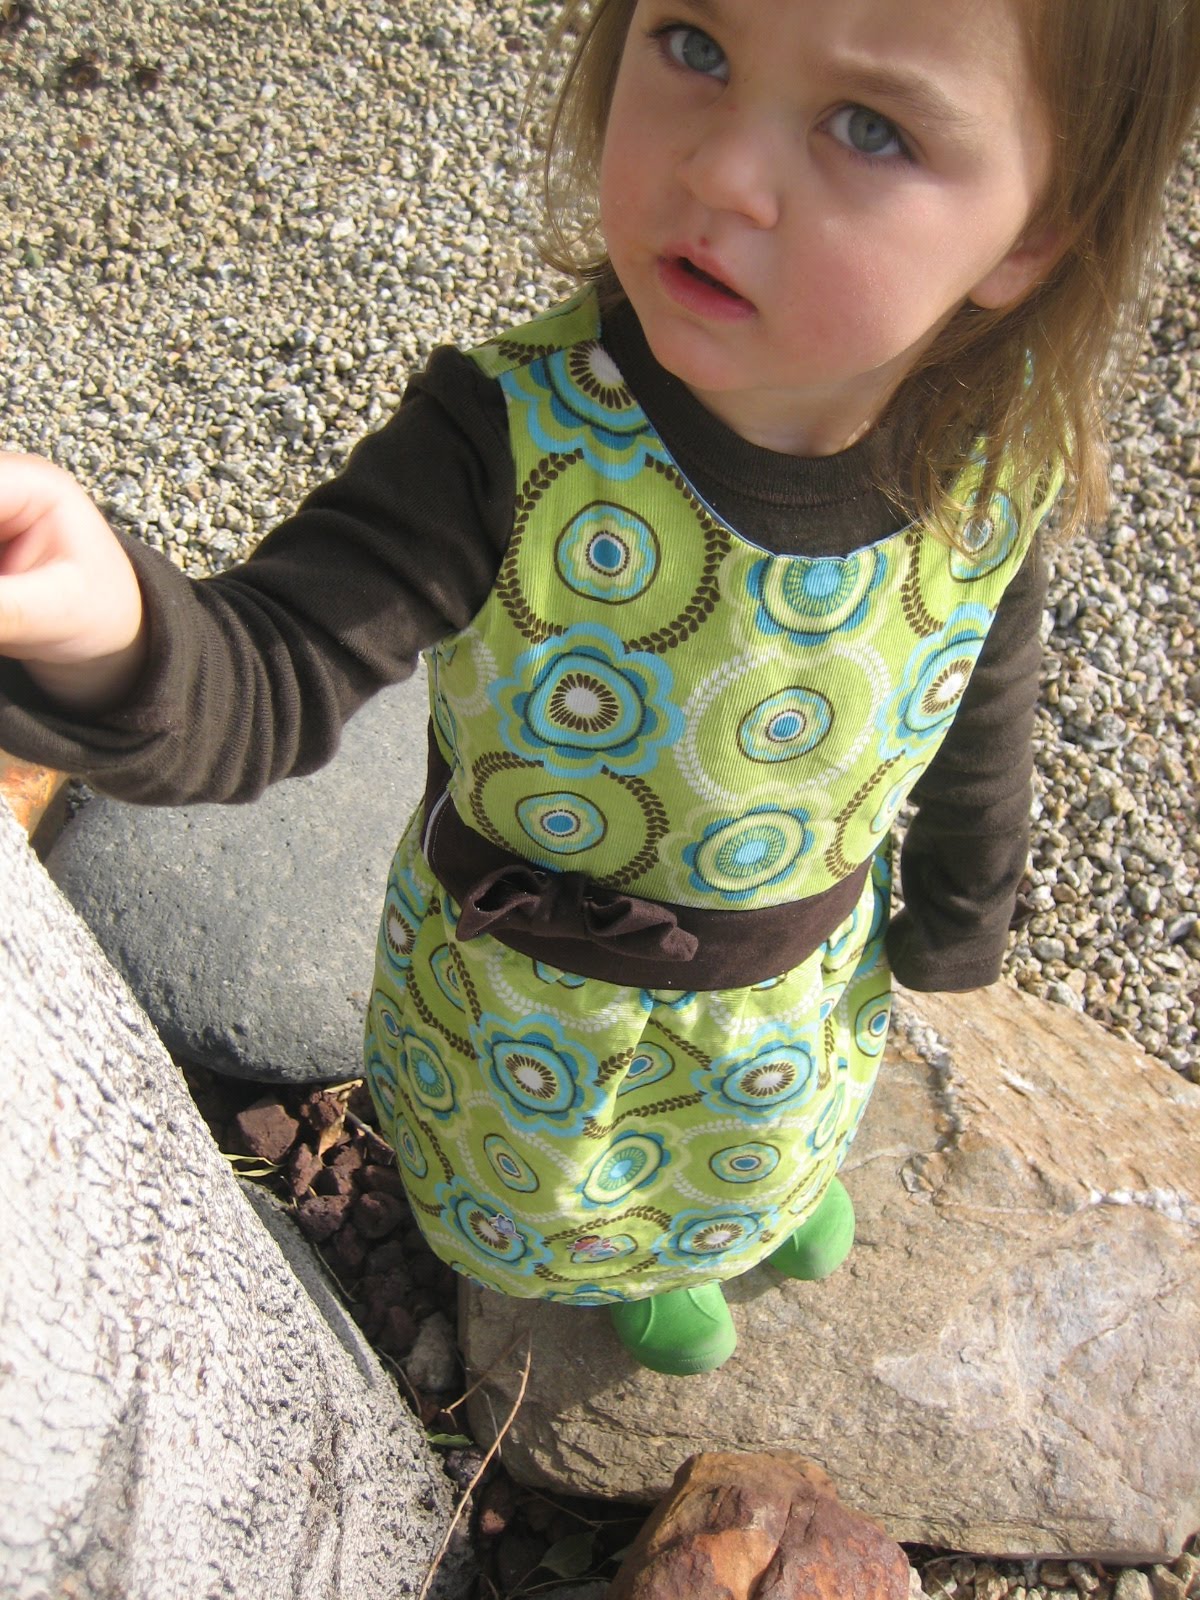
Melting Into Spring Jumper

What's a little girl to wear when she finds that winter is melting into spring??

How about a bright, swirly jumper!?

I'm sorry for all of you who can't fathom this idea just yet, but over in our neck of the woods spring is almost here!

So naturally, Sienna and I decided to go looking for it...


And needed the perfect jumper dress for the job!


One that has bright springy colors


But still with some soft, cozy velvet


And maybe a little extra lining since as you know we haven't found Spring just yet!

Ok, this one will do...

Now, hurry Mommy, we've got to find Spring!!!

SHH!

You gotta be really quiet and pay attention...


And look very closely...


But sometimes that you can just listen and the tree will tell you if it's here...

Wait, did you just hear that...??

Oh that's too silly!

I think I just found it already!


Almost Sweetheart, almost.

Thursday, December 23, 2010

Quick n' felty stocking stuffers

Need last minute stocking stuffers for your teddy bear little princess?

I thought these felt treasures were the perfect, quick, last minute and inexpensive stuffer idea!

...and I sort of hoped you wouldn't mind me using Miss Bear to model Sienna's future hair decorations just for now.


I put all 3 of these together in
oooh 15 minutes using pretty much felt scraps, glue and some old hair ties!

The head band is my personal favorite with the large teeth edge bow and a thin strip for band that I stitched to a scrap of thin elastic I had in my box of "don't throw away because you might use it for something somewhere sometime"
(hehe, glad I have that box now!)


I had some smaller scraps of pink felt about 1.5" x 3" that I thought would be perfect for a little pony tail holder bow.

Then I liked that so much that I fancied it up a bit for another brown one to go with this adorable dress I made her that you'll be seeing very soon....!


All I did for these pony bows is pinch together the square of felt (or 2 in the brown case), held it in place with a dab of fabric glue and covered up my messy work by wrapping around a thin strip of felt down the center. Just before I sealed the wrap with glue I stuck an old hair rubber band against the bow right under the wrap!


Since I give my ponies a tug and yank when I take them off... and so does the mini me in my life... I did do a couple of hand stitches to sandwich close the rubber band between the outer wrap and the bow. I used embroidery thread here, but I think any type of doubled up thread should be ok.


Don't you just love these easy little felt bows?!

I know I've seen these from a few different crafty bloggers out there, and I'm so sorry for not listing all of them, but I do know that I recently saw a great and simple tutorial for felt bow clips
over at Craftiness Is Not Optional.

Very doable at the end of a shopping budget!


Then... while I was starring at all those scraps of felt I remember the brilliant idea that I saw that I almost forgot about until just in the nick of time!

Felt baby doll diapers!!


Now these honestly are NO SEW at all!

Just a few snips, tucks and stick ons.

I made a few different sizes for her various dolls, but they're adjustable so they even fit her smallest baby pictured above :)

I saw these a long time ago from the lovely ladies at Kojo Designs and almost forgot all about them until now!

Check out their tutorial here.


Another 15 minutes for these guys and I still had half of a nap time to spare!

Go head, stop reading now and go try it!

BUT WAIT!

Before you go....

I also want to take a few minutes here to say that one of my favorite Christmas presents, any presents all year are all you wonderful bloggy world friends out there that give me more motivation, inspiration and fun than I ever imagined this crafty mommy blogging business ever would!!

Thanks so much for all encouraging comments you and the great ideas you all share!

Merry Christmas to all!!

Monday, December 13, 2010

Easy Fairytale Princess Hat Tutorial

After seeing all those magical Disney princesses dancing around it's hard not pretending you're one too!

But even with the lovely little princess dress her mommy made her, she just seemed to be missing one very important thing....

A princess hat of course!

So I whipped one up in fairly or should I say fairy little time (wink, wink)


Wanna try?


Here's what you need:
  • A quilter's square of fabric (I used satin, but you can do whatever)
  • A matching square of strong interfacing or felt, or something thick to keep it up.
  • Ribbon or tulle
  • Elastic string
  • Optional ric rac or decorative trim
  • The usual sewing goodies

Here's what you do:


Step 1: Trace a basic cone

I used an old unfolded party hat to trace a basic cone shape and just made the top slightly taller to be more princess like.

You could kind of fudge this by making a semi-circle approximately the length of your child's head if you don't have a party hat to spare. The height doesn't really matter too much, but the taller you make it the harder it might be to stand up.


Step 2: Cut the fabric

Use your pattern to cut a cone shape piece of fabric and interfacing/felt. You'll end up with 2 pieces.

Step 3: Sew the interfacing and fabric together

Sew the interfacing and fabric together at the curve only. It helps to start in the center and sew in each direction.

Fold inside out to hide your seems. This is a good point to add any decorative trim or ric rac you might want to the rim of the hat.


Step 4: At the elastic string for a hat strap

Imagine the cone in 4 sections; you'll want to sew the elastic string from one end of the middle 2 sections to the other. In other words, just put it in the middle. But the sections helped me visualize exactly where when I was doing this :)

Sew those babies in place with a little back and forth stitching.


Step 5: Attach the ribbon and tulle

Place long strands of ribbon and tulle into the middle of the fabric side of the cone.

Fold the strands into the cone by folding the cone inside out, so the felt part is showing and the fabric part is on the inside. You'll want the long strands to go through the middle of the inside out cone and the ends just barely poke out of the top.


Sew the strands in place at the top by going back and forth a few times at the top side and tip of the cone.

Now go ahead and sew all the way down the cone to close the seam. I used a size 16, heavy fabric needle to go through all the layers. A straight stitch is fine here, but I went over it with a zig zag just to be sure it'll with hold the test of a 3 year old.

Snip off the little extra ribbon and tulle you have at the top...

Turn right side out and voila!


Or should I say...

Bippity Boppity Boo!


Her last princess dream comes true!

Ok, probably not last....

Let's just wait until she hears about prince charming.


But for now, princess friends is all this little lady cares about and thank goodness for that!
Related Posts with Thumbnails