Friday, April 30, 2010

A Rose in my Tee Garden

I'm going to join most moms in America and say it,

I.love.Target.

But what I really, really love are their 50% and 75% off racks??! Check out this "crushed" pink t-shirt I scored for $2!!!

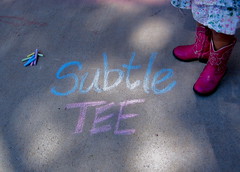
In case my husband, who was waiting patiently in the car while I "quickly" ran in to "just grab some pool towels and nothing else" is actually reading this, I know I was on strict in-and-out orders, but this hardly counts it was such a steal. What else would any normal woman do? Plus, isn't it only natural that the last entry for Rae's Spring Top Week contest from Subtle-Tee should be a tee refashion? I think so. All I have to say is good thing I buttered him up with our shredded pork this week, or he might make me wait in the car next time!

Besides the cost and the great "crushed" rosey pink color, this poor shirt didn't have much going for it. It was a few sizes too big and very wide at the bottom....


...the perfect combination for a little low waist shirring.

Also, the extra size gave me plenty of room to trim off the neck and the ends in order to get a enough fabric for some ruffle lining along the collar that I liked on a bunch of other, much-more-than-$2 Target Tees.


Last, but not least, I've been anxiously waiting for the perfect excuse to sew a top with rouched sleeves and what better opportunity than this?

Because the shirt was so big, the sleeves were still slightly long and loose, so I threw in a single row of shirring or rouching right down the center of each sleeve.


I had so much fun designing on the fly, and couldn't stop day dreaming of all the tee refashioning possibilities! Not surprisingly, the last minute spin on the sleeves ended up being one a really great touch and totally brought it all together.

Viola!!! Here it is:


Now this beautiful rosy pink tee has a new feminine twist that is more fitting of its color and naturally gives way to its name- A Rose in my Tee Garden.

Thursday, April 29, 2010

A pulled pork parade

I am SO excited to tell show everyone a new recipe I tried this week for shredded pork from The Pioneer Woman, who is just amazing! Much like this recipe, actually :) It just has so many of my favorite things in it that I was almost too excited to eat:

1) Delicious, moist, tender shredded pork with almost no time in the kitchen

2) Fresh ingredients that I literally grabbed right out of my garden

3) Pork Shoulder, which also happens to be on sale at our local Kroger for $1.27/lbs right now!!!

4) The help of my two best friends in the kitchen


5) And most importantly for us busy mommies- VERSATILITY!


I took my own little spin off the Pioneer Woman's recipe and was able to knock out several great meals in one with this little piggy.

Ingredients

* 4 pounds (up To 7 Pounds) Pork Shoulder
* A few sprigs of Fresh Oregano finely chopped, or 1
teaspoon dried
* 1 heaping teaspoon Ground Cumin
* 1 heaping teaspoon Chili Powder (we like it really
spicy, so I actually did 3)
* 1 Tablespoon (to 2 Tablespoons) Salt
* Pepper To Taste
* 3 cloves (to 4 Cloves) Garlic
* 1 Tablespoon (to 2 Tablespoons) Olive Oil
* 2 Tablespoons (to 3 Tablespoons) White Wine Vinegar
* ¼ cups Brown Sugar
* 1 whole small to medium sized onion
* Lemon wedges (It's probably better to use lime, but I try to
keep all of our family meals under $5 and wanted to use the
lemons from our garden).
* Optional 1/2 teaspoon Serrano peppers for extra heat!

Directions


Gather those best friends we were talking about.

Simply toss the oregano, cumin, chili powder, salt, black pepper, garlic, olive oil, white wine vinegar, brown sugar and serranos if you're using them into your first blender buddy:

Once you've given it a few runs, cut the onion in quarters and let it join all that fun. Blend the mixture until it is completely combined.

Rinse and pat dry the pork shoulder.
Rub the mixture all over the pork until it is spread through every tiny hidden part you never thought there was. Place the meat into your other bestie (the Crockpot) with any remaining rub and about 2 cups of water (depending on the size of your pork).

Set the Crockpot to low and cook for at least 7 hours and up to 13. One tip that I always like to do with my Crockpot, and especially when it's hot, is put it in the garage or out on our back porch to cook. That way it doesn't heat up the house and you still get the faint smell of delicious cooking, but not the all day long nagging of it that makes you want to cheat and peak the lid open!

When you're done cooking simply shred the pork shoulder with two forks directly in the Crockpot. Make sure you spread some of those yummy juices back over the pork once it's shredded.

If your family is anything like mine, you're probably going to have to shred far away from sticky fingers and fast! I almost thought it wouldn't make it to the table my husband wouldn't stop "having a little taste" it was so good....


But once it did, we enjoyed ours with warm corn tortillas, fresh salsa, lemon wedges (from our garden, otherwise I recommend limes), refried black beans and a little extra flair of our garden fresh cilantro.

On the second night we changed it up a bit by adding our favorite bbq sauce to make pulled pork sandwiches. This was perfect with our sides of coleslaw and sour cream n' chive potato chips.


On the third night I would've loved to make enchiladas or a soup with the leftovers, but there must be a little raccoon living with us because I just checked the fridge and it was almost gone!!! I guess I'll just take that as compliments to the chef :)

I'd love to hear if you try this and any changes you thought to make. Feel free to comment or email anytime!

Monday, April 26, 2010

Forget Me Knot


That's what I'm hoping my Forget Me Knot top will be for Rae's Spring Top 2010 contest I'm doing!!
The competition is pretty stiff, but I'm hoping that my own design for my Forget Me Knot top will be unforgettable (hehe) enough for people to at least come check it out!


It's so hard for me to find clothes that fit me! Tops are always too short or just right everywhere else but too big in that one important region. So when I do find one that I love, I covet it so much that I end up hardly wearing it. Meet one of my top 10 favorite Spring and Summer shirts, "Ole' blue" -->


Maybe I'm the only one who is this ridiculous, but I find myself thinking

"Oh no, I can't wear my favorite shirt today, because then it'll be dirty and what if I end up having somewhere special to go later this week and then what would I wear??"

I know, doesn't pass the logic test, but hey, admitting you have a problem is the first step. The second step for me was learning how to sew, so that I can just make myself another shirt just like my favorite one anytime!

There are many things I cherish about "Ole' blue," such as comfort, fit and most importantly for us baby factories- ADJUSTABLITY! I love ties on the side that allow you to make it as tight or loose as you like. I can wear this beauty for a few months into my pregnancies and anytime after.

Adjustablity became my motto when drafting up sketches for this Forget Me Knot top. In addition to adding some much need color to my collection with leftover fabric from my Zip-A-Dee-Do-Dah skirt, I decided to take the adjustablity a step further and incorporate it into the sleeves as well!

I also added elastic under the gathering at the bust, so that it can easily be used as a maternity shirt down the road, but doesn't always have to look like one. My husband liked that part :)

Now THIS is my new favorite top! I know what you're thinking... but *knot* to worry, it's just way to comfortable not to wear it all the time!!!

Friday, April 23, 2010

Please, come in and have a seat at my desk...

...while you wait for me to change your stinky diaper??

Well, ok, it doesn't quite have the same ring to it as a stay-at-home mommy, but that's no reason not to love having one!!!


A few weeks ago we found this seriously abandoned desk at a garage sale for $20. You wouldn't believe the third world sweat shop sewing conditions I'm working under right now, so $20 seemed like FREE to help me upgrade from my broken card-table sewing desk!

What the picture doesn't show is that it shakes vigorously every time you press the pedal.
I feel like I'm sewing in a blender!

Ok, I'll be honest, there's no sugar coating a turd here, this thing here was ugly... but under the many tacky layers of ugly was a bright rainbow of potential for this mass of strong, solid wood.


Wouldn't you love to know the vision for all these colors in one piece of furniture?


While it makes for a pretty neat photo, this wasn't exactly our color scheme, so we busted out the trusty sander and got to work!

After a few hours of sanding... blah!

We got to test out Kevin's new spray gun, and by "we" I mean Kevin, because he was too excited to let me have a turn. Note to self, buy Kevin a new sander next time we refinish furniture :)


You'll never guess how long it took us to paint this whole thing with our new spray gun??

About 30 minutes!!!

That's including all the little knobs and drawers. Oh.My.Gosh! I love this thing!!


The second best part that I didn't know about using a sprayer is that it dries in half the time too! We moved it inside within the hour!


I really, really like it.

I know I said this transformation was supposed to be my new sewing desk, but you have to promise not to tell my husband, but I love it so much in our guest room just like this, so pretty and clean, that I almost don't want to put my sewing machine on it... I'm sure I'll be over that next time I sit at my blender-table, but I just couldn't do it even for a picture's sake just yet!! It still has that fresh paint smell... give me time... I'll get there!

Thursday, April 22, 2010

I'd love a tee-tank with my spring!

Top three reasons why I heart my hubby's abandoned under shirts:
1. Wash after wash they still have his yummy smell to them
2. They are always super soft and comfortable
3. They make very easy and cute little refashions like this one in less than 20 minutes


Who says cut-off tank tops are only for sweaty guys at the gym? This is totally feminine and cute enough to wear out and about.

Wanna try?

Materials:
1. Freshly washed t-shirt (we only want those good smells to linger!) that fits loosely on you
2. Sewing machine, thread needles and scissors

Step 1.
With a piece of chalk or fabric pen, trace around your favorite fitting tank top on top of your flat tee about 1 inch away from the tank top for seam allowance and ease. Cut out only the sides of the new "tee tank." No need to cut the shoulders, because they're going right back together :)


Step. 2
Fold the Tee Tank inside out, line up the arm holes and pin in place. Sew the sides together using 1/4 in seam.


Step 3.

Cut out two strips 2 inches by 4 inches of shirt from your left over scraps.


Step 4.

Fold the tee tank right side out. Determine where you want your 'pinch' to be in the sleeves and tie the spot in place with a piece of string.

Step 5. Allow the edges to naturally curl in before you wrap each strip around the string marker on your tied sleeve.

Step 6.
Wrap the strip around the string that is pinching the sleeve in place. Make sure the ends are curled under. If they aren't staying curled, you might want to hem them under before moving on. Carefully sew the ends of the strip together so that they are snug against the sleeve and will hold it pinched together as close as you like (try not to sew over the string you tied on, so you can pull it off later).

Step 7.
Untie your string to take it off. Move the wrap so the seam is positioned in the back and cut off the excess strip. And you're done!

Snap a quick picture of your new Tee Tank and email it to me so I can see!

Tuesday, April 20, 2010

ZIP-a-dee-doo-dah skirt!

My, oh my what a wonderful day!


Sometimes things just happen for a reason. But, isn't it usually the case that when the thing is happening, for the life of you, you cannot see a reason in sight! Over the last two weeks our computer has slowly been existing on the fading strings of life support. On Saturday night "Pute's" clicker stopped clicking leaving his loved ones behind without a place to go to check email, search the web and blog all about it.... it was a sad and lonely weekend.

So why zip-a-dee-doo-dah?? Well, let me tell you!! In my period of mourning, I decided to splurge and buy brand new fabric that totally inspired me to do the one sensibly thing that always makes me feel better.

So I did.

I turned to the one machine that I knew would lift my spirits and have me in stitches in no time (I couldn't resist a teensy pun). And I am SO GLAD I DID!!! Look at this lovely spring skirt I made!


The best part of all is that I actually didn't intend for this to be a skirt. I was going to sew matching shirts for Sienna and me, but after looking at the fabric long enough I just really wanted it to be a skirt. Do you ever do that?


I never thought I'd say this, but luckily in this case, my measurements for my bust and waist are close enough that I could fairly easily convert it to a skirt even though I had already made a few cuts in the fabric. It was just a tad tight pulling over my hips, so I knew what I had to do and I didn't like it... not one bit. But considering I had no alternatives (where things happen for a reason come in), I had no choice but to tackle sewing in a ZIPPER!!!


Would you believe me if I said it was ridiculously EASY?! Why was I so afraid of this before? I was so excited that I figured it out on my first try with honestly no trouble at all that Sienna and I just had to dance all around with me in my new skirt singing "zip-a-dee-doo-dah" and it seems perfectly fitting to name the skirt as such :)

The skirt itself was pretty quick and easy, would anyone be interested in tutorials for this stuff?

Saturday, April 17, 2010

The Great Landscape!

It's been a year in the making... and now we are proud to present phase 1 of The Great Landscape DIY style.

Our canvas


One homogeneous streak of dirt shaded sidewalk, rock, house and a red roof to top it all off.


Our masterpiece (phase 1 of course)


A little more personality, a little more functionality, a little more color and a lot of sweat and hard work!

Design elements and inspiration:

Functionality, functionality, functionality
First of all, let's face it, where we live a "cool summer" night is just low into the triple digits! We need shade! So we planted a second tree to eventually shade the large front window. We also hope to mooch some added shade from the 3 hibiscus covering the two arch windows to my sewing room :)

Second, the expression when it rains it pours must have been coined somewhere very close by. Luckily it doesn't rain often, but when it does we could dock a boat next to our front door.


Why was I surprised when we used an entire day of free baby-sitting up on hauling dirt, sloping and trench digging? We tackled this beast by first adding dirt that sloped away from the foundation. Next, we dug a small downward sloping trench behind a retaining wall near our front window and covered it with large river rock to create a stream for water to flow to the street.

Last, we added about 6 tons of rock to help keep down the weeds and to cover the dripper system we built to water our new plants. We wanted to change the rock color, but it turns out the ex-duelers had very expensive rock taste. Who knew the "sidewalk" color rock was so coveted?? Anyway, turns out the most cost-effective option was to simply add to the existing rock rather than haul away and replace or buy enough to cover all the existing. In the end, I think I like how it turned out!


Color, color, color

Since "sidewalk" wasn't my favorite crayon color, we decided we needed some serious greenery and maybe a few pretty flowers to break up the monotony. Thanks to Home Depot and their trusty by-the-four-hours ditch witch rental we dug 31 holes over our entire property!


You can see the fruits of a number of these bad boys here in the front- a few hibiscus, some 'torch glow' bougainvilleas, purple ruellias, orange jubilee vine over the wall and callistemon shrubs (seen in the very front). We didn't quite get them in these shots, but on the far right of our property we planted a "wall" of yellow bells and jubilees to add a little privacy from our neighbor.

The hardest feature to appreciate in these pictures, but easily one of my favorite additions is our little brick paver in the corner by our walk-way. Kevin's promised me a big beautiful pot of whatever kind of seasonal flowers my heart desires as soon as I find one I like!!!

For those of you who have never had the pleasure of landscaping, all I can say is I know why they used to make concentration camp prisoners move piles of rock back and forth aimlessly all day... it is torture! Then again, when you use it as your date day, you end up finding some way to make it a little fun. Shhhhh, don't tell Kevin I said so or he won't think twice about coercing me to taking on his share for the backyard. I suspect this is one of those "not as fun the 2nd time" type deals.

Thursday, April 15, 2010

Shiver me chic

I LOVE me new buried treasure!


I decided there were far too many winter clothes aboard my closet ship and not nearly enough spring tops. That's just not going to sail with this gorgeous weather. So the only logical thing to do for this Cap'n Long Sleeves was to walk the planks!


Cap'n Long Sleeves was originally an incredibly soft top (93% lyocell and 7% spandex) that I got from Banana Republic in the sale section last year. I bought it with every intention of living in it through the winter, but it turns out that the sleeves were a little short on me, it was a tiny bit see-through and a little too warm to wear under anything. In other words, the perfect combination for a re-style!!

I have to admit that my first thought wasn't oooooh this shirt could be some fantastic pirate booty, but I did have a few key elements in mind with my design:

First and foremost, I knew I wanted the mid-bicep sleeves for a spring top. I LOVE how it feels snug on your arm and I think it makes them look elegantly long and slender.


Second, because it was a little see-through, I knew I wanted some decor down the front to not only add texture and dimension to the skirt, but also to hide me buried treasures a little bit more! I run a G-rated ship around here!

That's when I had the idea to cut up the sleeves and add them down the center as layered ruffles! So in right now and so incredibly easy to do!

I simply cut four pieces 4" x 6" out of the sleeves, hemmed them and ruffled them at the 6" end. Then I drew 4 evenly spaced lines down the front of the shirt and sewed each layer on. The trickiest part here was taking care not to snag the fabric, which was more delicate and stretchy than I was used to sewing.

I had a bit of material left over and didn't have to think twice about their destination! The long scraps were perfect for the "wad and sew" flowers that you see in tons of stores right now. In no time at all this conservative long sleeve shirt transformed into what I now fondly refer to as me Shiver Me Chic tee


AAAAARRRR-DORABLE!

Tuesday, April 13, 2010

Roast Chicken

Roast chicken delicious enough to invite your mother-in-law over for dinner!


For some reason a freshly roasted whole chicken seems so fancy. I've always been way too chicken to try cooking one myself :) I just figured there was a reason they sell so many rotisserie chickens at the grocery store- it must be very hard to make at home. It's not!!!

This chicken is so fantastically aromatic that when my husband walked in the door the first thing he said was "oooh what's the occasion? Are we having something special for dinner?" Naturally, I ceased my opportunity and said "Yup! Just cause I love you." Shhhh... he doesn't have to know that it was less work than most meals! Ok, I'll stop ranting about it and let you try it already:

Ingredients

2 Tbl extra-virgin olive oil
4-5 cloves garlic crushed
1 large roasting chicken soaked in brine
1 lemon
1 bunch fresh rosemary
sea salt & freshly ground pepper

Directions
Preheat oven to 450. Rub the olive oil and 3 of the crushed garlic cloves over the chicken. Cut the lemon in half and place in the cavity of the chicken (if the chicken isn't that large, I just use 1/2 of the lemon.) Along with the lemon, place the remaining 2 cloves of garlic and a sprig of rosemary inside. You can buy rosemary starts in the little pots at Target and plant them in direct sun. They're fairly easy to grow and last for years. Sprinkle salt and pepper over the chicken and stick one of the rosemary stalks under the skin. Place the chicken on a rack in a black iron skillet or heavy roasting pan.

Roast for 30 minutes, then turn the oven temperature down to 350 and bake for an additional hour, or until an instant-read thermometer inserted in the breast portion registers 150-154. I used a 5 1/2 lb chicken and it was ready in just under an hour. I saved my juices at the bottom of the pan and made really yummy gravy. Or you could freeze it and stash it away for some broth for another meal.

Last, but not least take a picture of your fancy dish and email it to me!


What's brining??? Only the secret to melt-in-your-mouth poultry! Here's how to brine a chicken.

I'm sorry for not believing you, Aunt Dawne, when you promised me that this was the easiest and tastiest chicken recipe you've had! I knew it was a hit when Sienna looked right at me and said "Mommy, this is licious!" Even a 2 year old knows delicious chicken when she tastes one. But the biggest compliment of all was from Kevin who didn't even use bbq sauce, which I have NEVER seen him forgo with any chicken.

How to brine a chicken

Remove chicken giblets and rinse the chicken inside and out. Place 1 cup salt to 5 quarts water in a large container and stir to dissolve the salt. Submerge the chicken in the brine, making sure it is completely covered with brine. Cover and refrigerate for at least 3 or up to 8 hours. Remove the chicken from the brine, rinse well and pat dry.


TIP: Find a pot that the chicken will fit in snugly then begin with 1/5 cup of salt & 1 qt water. This is all I ever need to use when I put the chicken in my small stock pot.
Related Posts with Thumbnails